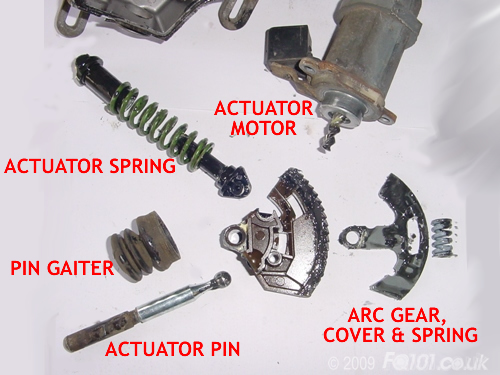
Most people are aware of what the actuator does, but few are aware of how it actually works.
The principle of the actuator is to automatically push the clutch release arm (and hence clutch) to remove drive from the engine to the gearbox. This action is simply taking the place of a clutch cable and your foot in a conventional setup.
The actuator motor is held on with 2x T30 torx bolts. These will be held on extremely tight as the actuator is typically a non-servicable item.
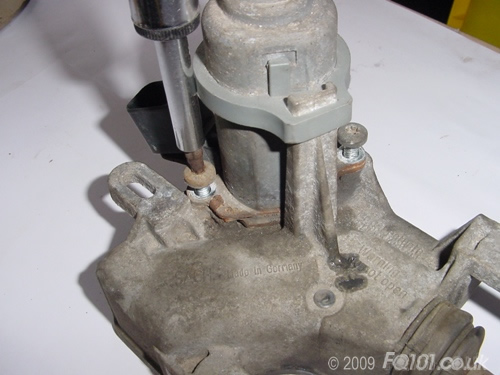
Once these have been removed, you need to release the locating bracket by pushing up, and pulling the locating lug out. Again, this will be on very tight.
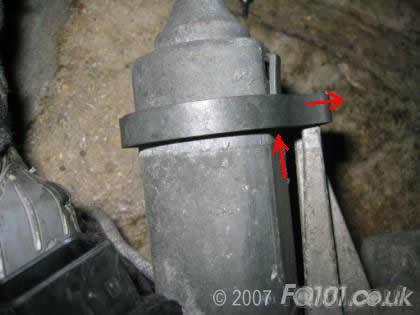
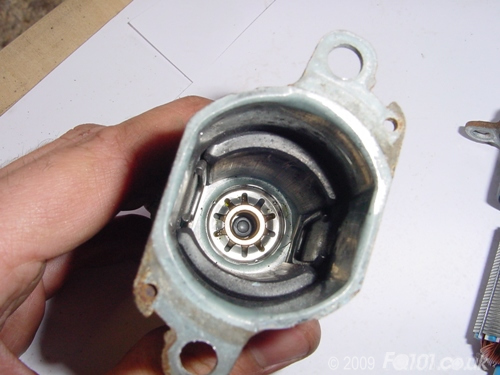
The actuator motor is now free. You will have to use a bit of force to remove it from the actuator case.
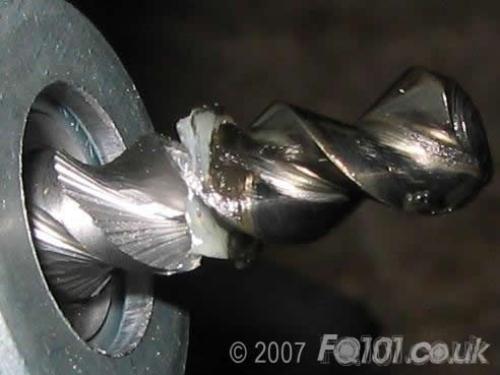
You can see the helical gear on the end of the motor shaft gives uniform and consistant control over the actuator movement.
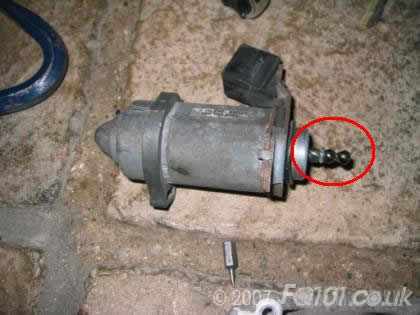
When adjusting the clutch, the Star (and Winstar) machines have the ability to adjust the position of the actuator by decimals of a millimeter. This is achieved by utilising a series of tiny steps in the gear on the end of the motor shaft as you can see from this close up image:
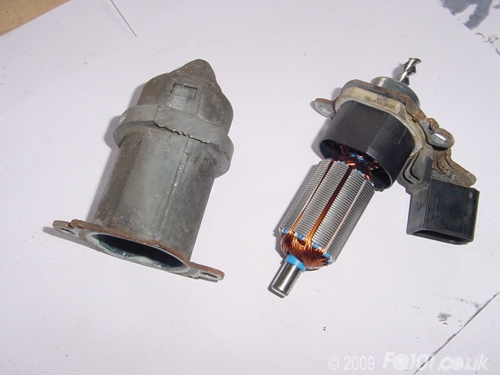
The motor itself is a simple DC motor with the coils on the rotor and permanent magnets on the stator. If you are only servicing your actuator, do not attempt to take the motor apart. This is just to show you what it looks like inside.
The actuator pin is secured on a simple balljoint which will remove by pulling hard. You can see the reason for this is to take up and small deviations in the path due to the arc angle taken by the actuator cog.
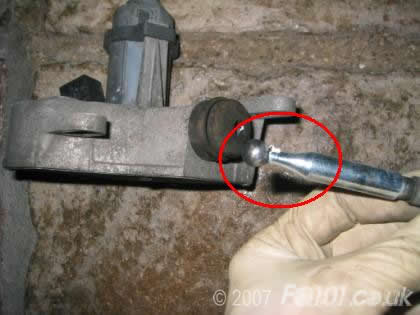
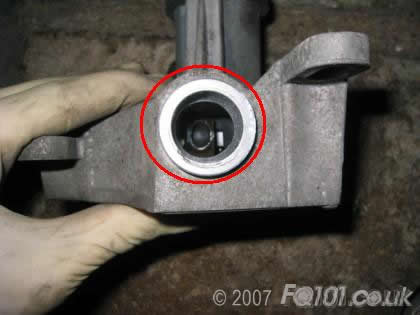
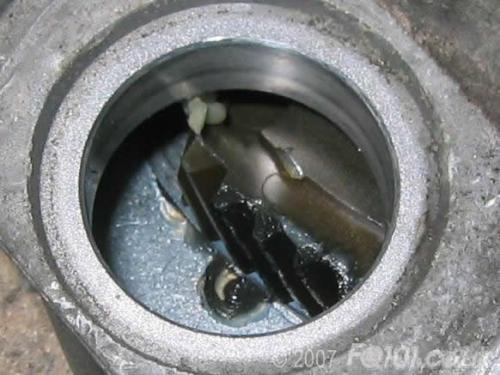
Looking inside, you can see the ball joint socket. If your actuator has become lethargic in operation, flood this with grease.
The worm gear on the end of the actuator motor connects into an arc gear mounted in the main unit. This pivots on an axis creating the linear movement. If servicing the actuator, flood this area with grease as well.
WARNING: The next steps show you the inside of the actuator assembly. If your actuator does not work following a simple service, it is likely that you need a new actuator. We do not advise opening the actuator assembly as the internal return spring is under high compression. Certainly do not attempt to refit an actuator once the cover has been removed.
A new actuator can be ordered from your smart dealer under with the following part number: SQ000 3226 V016 0000 00. However, they are around £200 new, so make sure it has failed before you hand over your hard earned cash!
Under the cover, you will see the internal workings of the actuator. The following picture shows the actuator parked in the 'engaged' position. The pin is retracted fully so it is not pushing on the clutch release arm. The clutch will be engaged as a result.
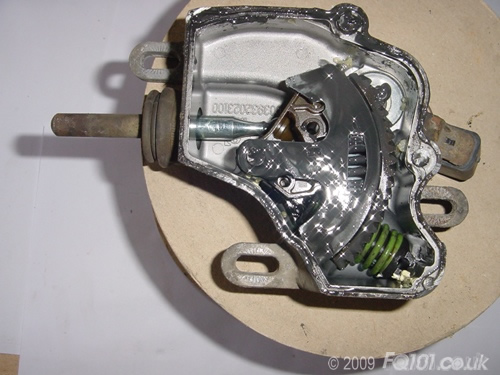
Due to the position of the arc gear, the actuator spring is fully compressed, but the force is acting towards the arc gear pivot point. As a result, the arc gear cannot rotate. The actuator is stable.
Upon changing gear, the actuator motor will begin to rotate. The arc gear will start to turn around its pivot point. The pin will start to move out linearly.
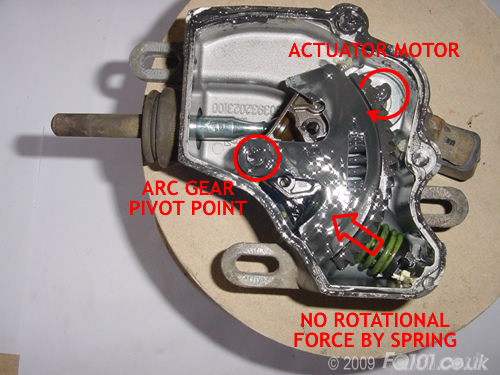
As the arc gear turns, the force of the actuator spring no longer acting towards the arc pivot point and it can assist in turning the arc gear. This is useful as the motor alone does not have enough force to push the clutch release arm.
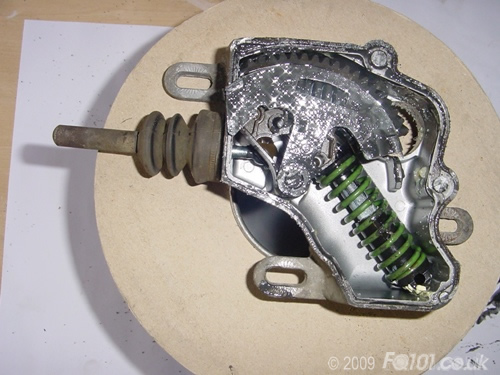
The spring continues to thrust the pin out in a very quick action. It needs to be quick as delayed operation of the clutch release arm will lead to clutch wear (similar to 'riding the clutch' in a conventional setup). In this position, the clutch is disengaged.
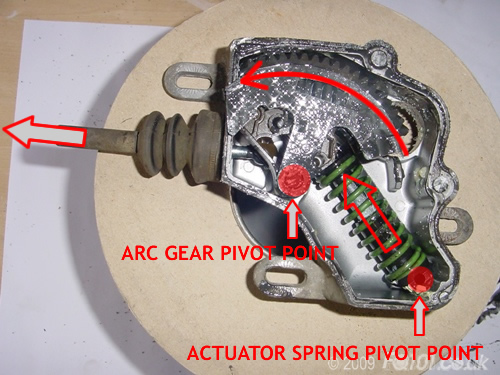
If you understand moments, you can see the the actuator motor is positioned further away from the arc pivot point than the spring. This allows the motor to overcome the force of the spring when returning the actator to the 'engaged' position.
These are the individual components that make up the actuator:
