

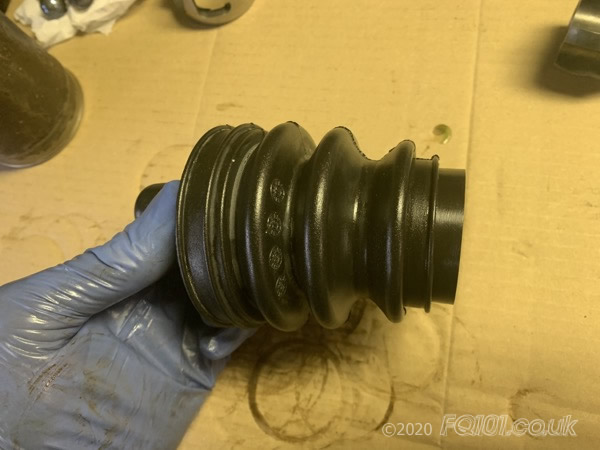
Both driveshafts are provided with two Constant Velocity (CV) joints which allow the gearbox and lower rear axle to move independently of each other whilst constantly delivering power to the wheels. Both joints are provided with ball bearings, packed with a special grease and covered with a flexible rubber boot. The boot keeps dirt out of the joint and (more importantly) keeps the grease in.
The original smart CV boots fitted by smart are good quality. Even on cars 20 years old with high mileage, we have seen CV boots in good condition and functioning correctly. However, rubber is a natural material and will degrade over time. CV boot failure we have seen is often a result of damage - either accidentally during routine maintenance or from debris off the road.
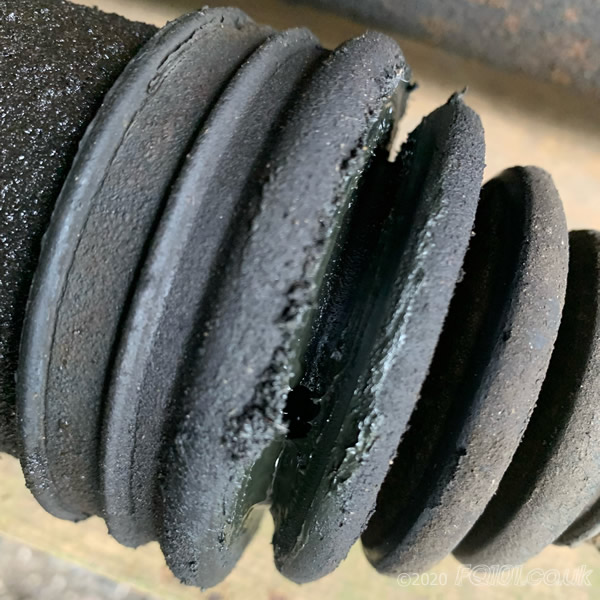
When the CV boot splits, the centrifugal forces exerted by the rotation of the drive shaft will case the joint grease to escape over time. Whilst this is unlikely to lead to a sudden failure, it is important to replace the boots when you notice problems.
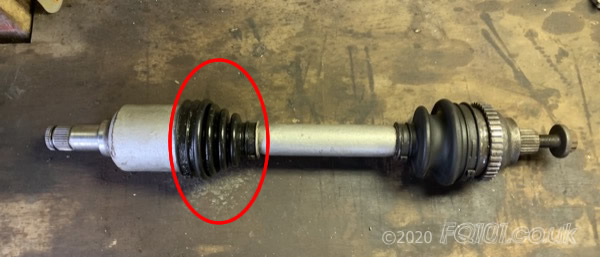
In this guide we are replacing the inner CV boot (the one closest to the gearbox) with a geninue smart replacement. The method for the outer CV boot is not the same and we will provide a guide for changing this in due course.
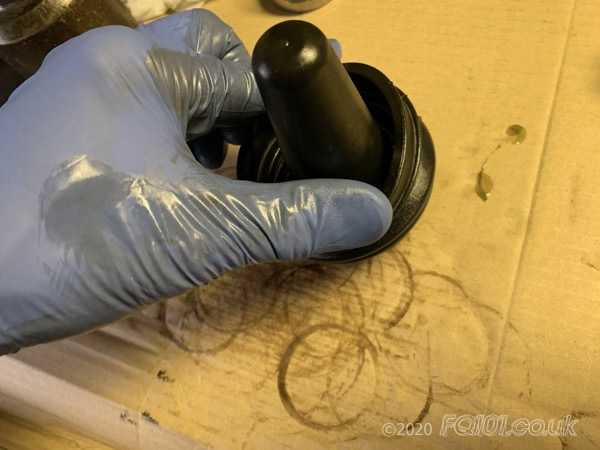
A failed boot is characterised by a build up of green gunk and road dirt as follows:
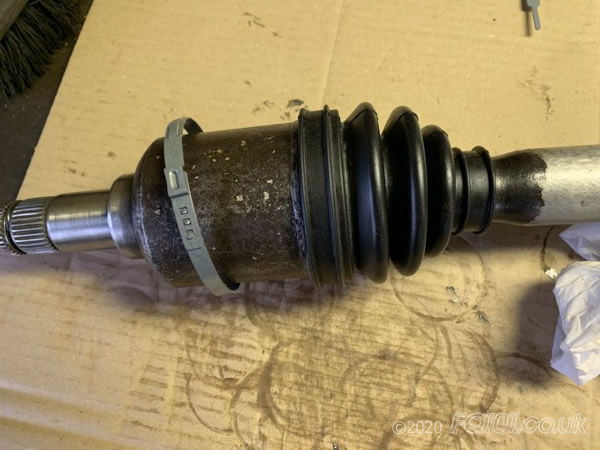
Start by removing the affected driveshaft from the car. Although this driveshaft has been cleaned up slightly, you can see that the boot is covered in grease that has leaked out of the CV joint.
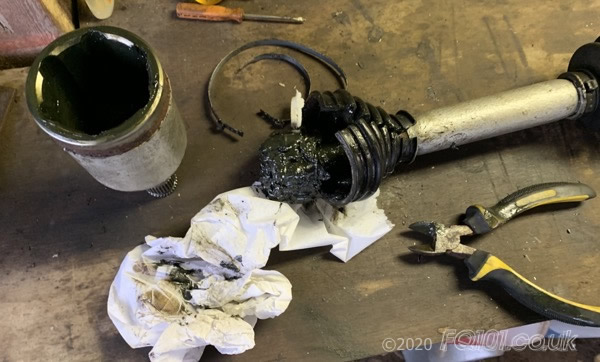
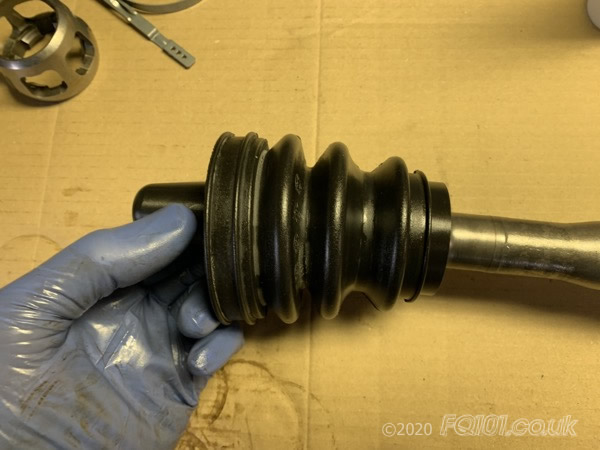
Start by removing the two CV boot clips at either end of the boot. These remove easily as they are only held in place with barbs.
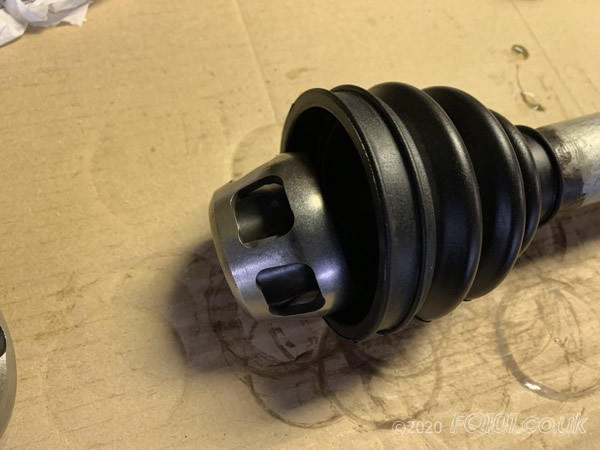
Interestingly, the only thing holding the inner CV joint together is the boot. Therefore, be really careful when you start to remove the boot from the gearbox end of the draftshaft as everything comes apart easily! Be careful not to lose any of the ball bearings.

Cut the boot free of the central section of the shaft.
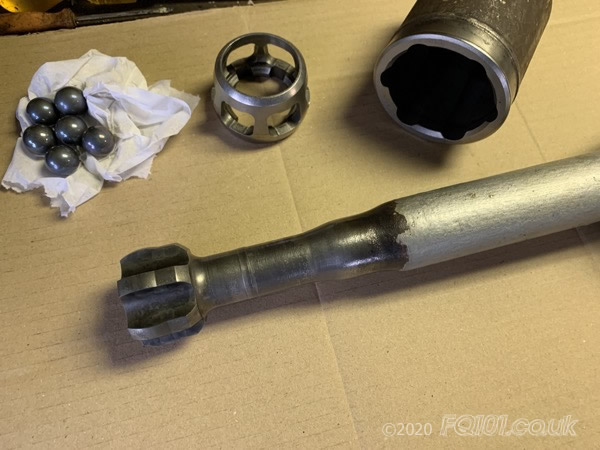
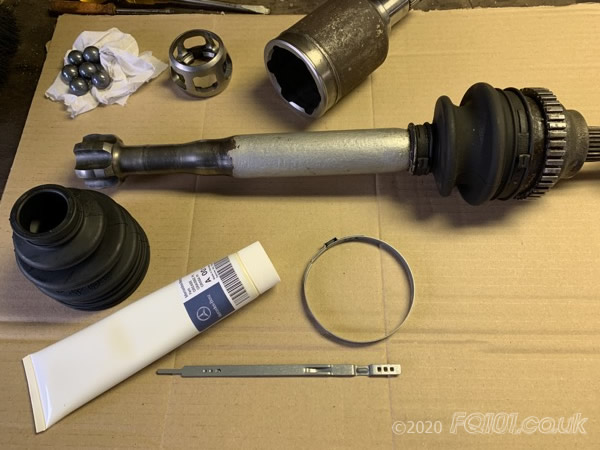
With the joint separated, carefully remove all 6 ball bearings from the carrier (if none have escaped already). Remove all grease and give everything a good clean with degreaser.
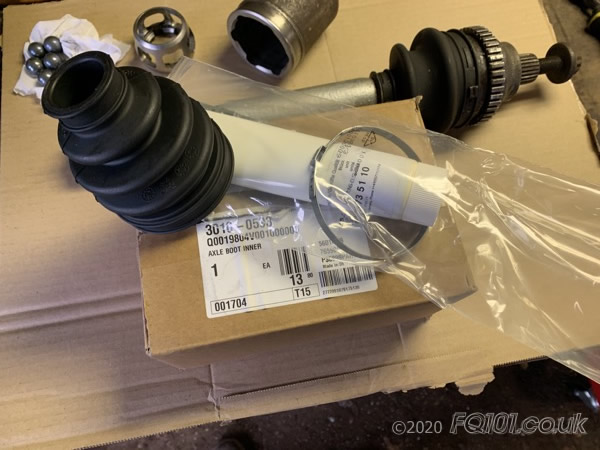
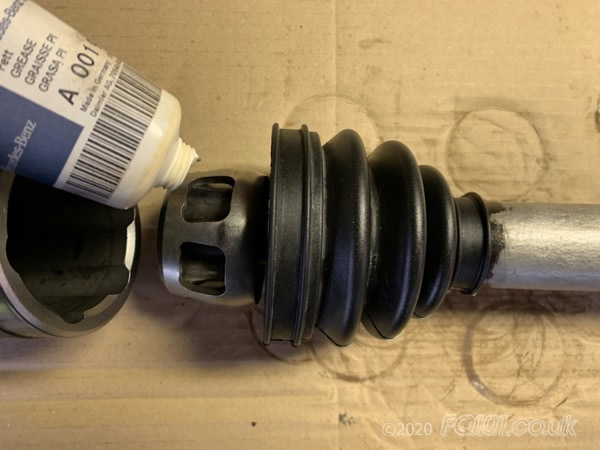
A new inner CV boot fitting kit can be bought from your local dealer under the following part number:
- Q001 9804 V001 0000 00 (Axle Boot Inner)
This kit comes with everything you need:
- CV boot
- Correct measure of packing grease
- Large diameter boot clip
- Small diameter boot clip
The large diameter clip comes already circular but the small one is flat. To form this into a circle of the right diameter, we recommend wrapping this around the central section of the driveshaft and allowing it to spring open to approximately the correct shape. Only do this at the point of fitting.
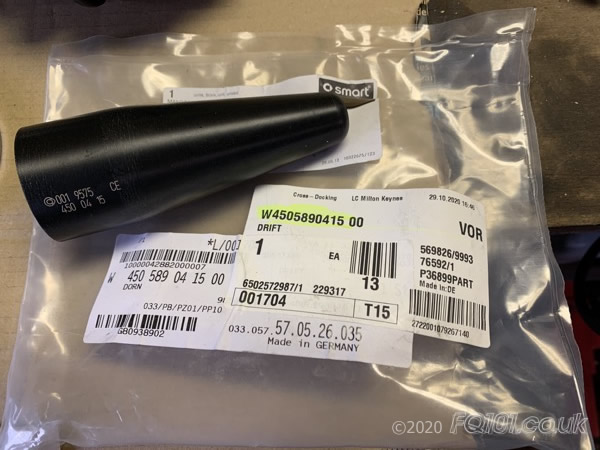
To fit the CV boot onto the driveshaft you will need a special tool called a 'glide', 'cone' or 'drifter'. If you are fitting aftermarket boots, you may not need one of these but for the geniune boot, this is essential. The tool can be purchased directly from your local dealer but some delearships can be reluctant to sell tools to the general public.
- W450 589 415 00 (Drift)
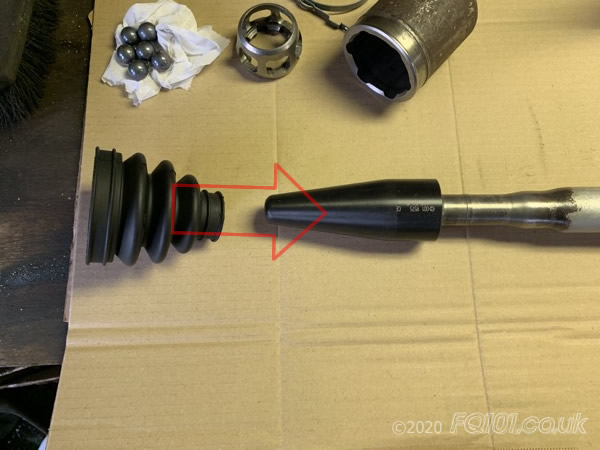
As the CV boot is a single piece, you need to strech the narrow part over the bearing end of the inner section of driveshaft. The drift fits over the shaft end and the boot needs to slide over this without damage. The following shows the concept:
With the drift off the driveshaft, cover the outer surface with lubricant. There are specialist greases available for this purpose but we settled for simple washing up liquid. Do not use anything which will attack rubber.
Warm the CV boot to make it more pliable by putting it somewhere around 30°C (86°F) for a few hours. The colder the boot is, the following step will be much harder!
Now carefully push the narrow part of the boot onto the drift with the wider section facing towards you. It will start off easy and then get harder. Work the boot along the drift as best as you can using your hands. Avoid tools as these can pierce the rubber rendering the new boot useless. If you struggle, stop where you are and allow the rubber to 'give' for a few minutes before trying again. It will work!
The last 2-3cm of the drift is at the same diameter and the CV boot should start to slide easily when you reach this point. Stop about 1cm before the end of the drift to avoid boot coming off the end of the drift and having to start the whole process again.
Fit the drift on the end of the shaft and push the boot off the drift allowing it to shink around the narrowest part of the shaft.
Remove the drift.
Give the new boot a thorough clean to remove any of the lubricant. As we used washing up liquid, this washed away easily when rinsed with lots of water. Allow the inside of the boot to dry thoroughly before moving to the next stage.
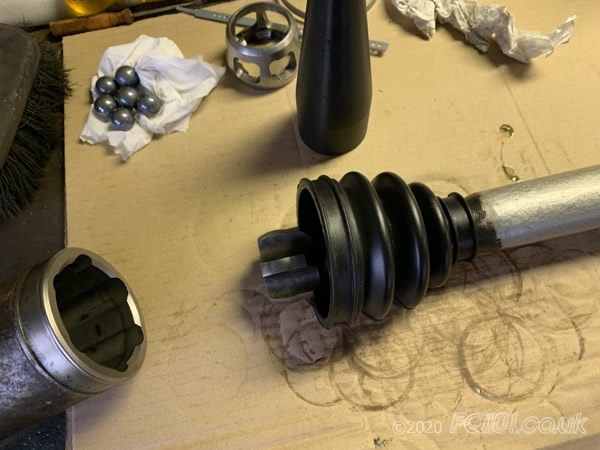
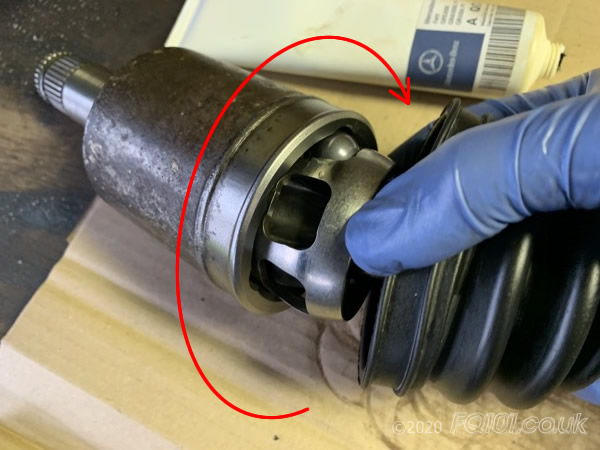
With the boot and the driveshaft dry, fit the ball bearing carrier as shown. The wider section faces towards the boot.
Use some of the CV grease provided in the fitting kit to help the ball bearings to 'stick' in place during reassembly.
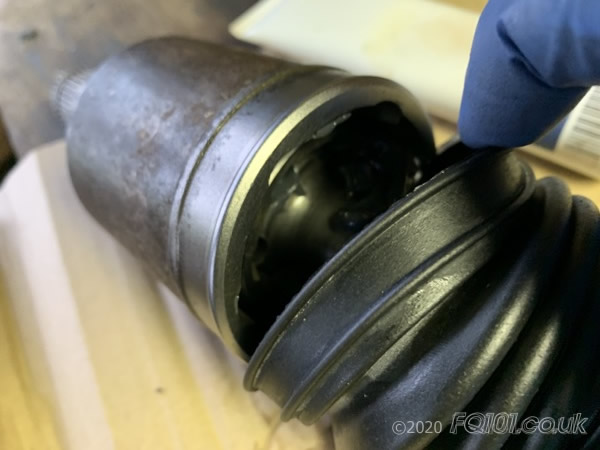
Fill the gearbox section of the driveshaft with approximately half of the grease. Then start to reassemble the bearings. We found that with the central section of the shaft held at an angle, we could fit a ball bearing and then rotate the assembly as shown allowing the ball bearings to be held in place without falling out.
With all ball bearings in place, add the remaining grease to the cavity. Clean away any excess.
Fit the boot over the 'lip' of the gearbox section of the shaft and fit the retaining clip.
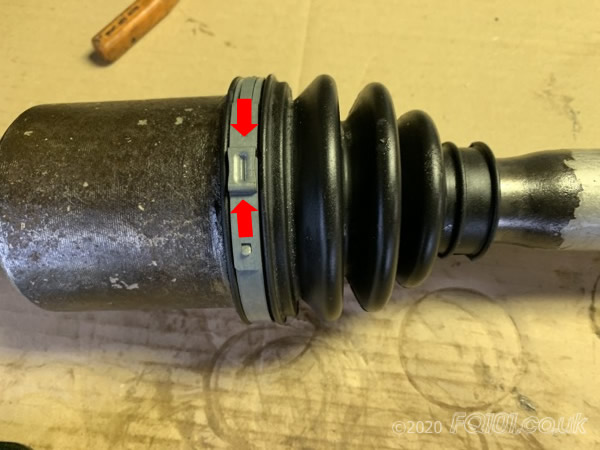
To clamp the clip into place, you will need CV clip pliers. These are available online from anything ranging from £3 - £50. We recommend avoiding the cheaper pliers as they can incorrectly crush the tightening section rather than pull it together. The objective is to keep the top section of the clamp flat whist the recessed indicated by the arrows are pulled together.
Repeat for the other clip and remember to wrap this around the shaft to form the correct shape before fitting.
Check for smooth rotation of the joint to complete the rapair.
Whilst the draft shaft is off the car, check your ABS rings and replace if necessary. You may also choose to paint them if they are looking a bit rusty. Then refit the driveshaft.


