The lower ball joint connects the base of the front wheel hub assembly to the wishbone. As you steer, the wheels rotate on their respective ball joints which are essentially pivot points. Consequently, the internals of the ball joints wear down over time.
Increased wear will allow the wheel to move in ways it shouldn't. This may lead to uneven tyre wear, vibrations through the steering wheel and poor handling around corners.
MOT test stations are generally pretty good at noticing when a ball joint is on its way out and will advise you accordingly.
In this guide, we will be changing the front right lower ball joint.
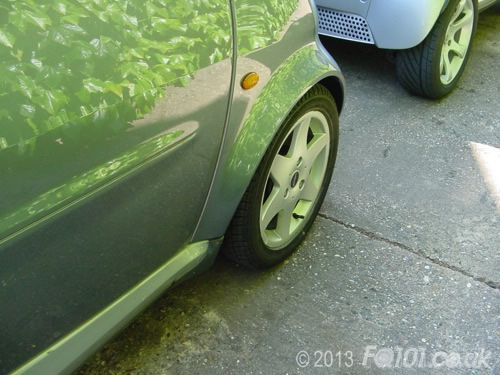
Start by jacking up the front of the car, secure on an axle stand and remove the wheel.
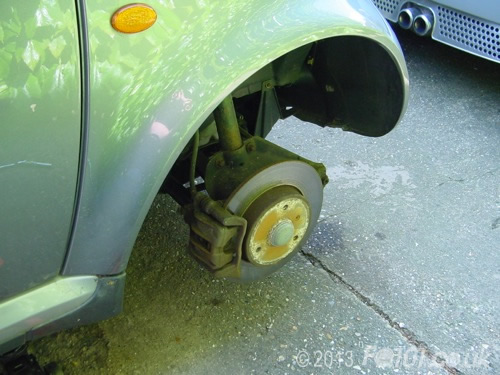
To access the retaining bolts on the ball joint, the whole hub assembly needs to be removed.
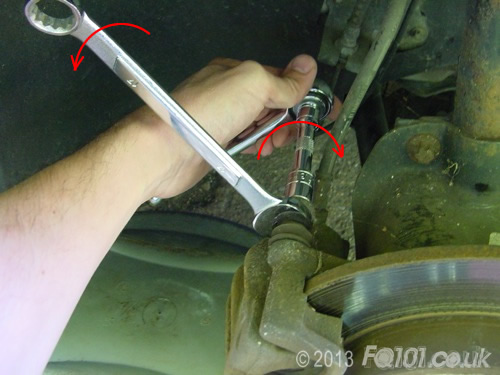
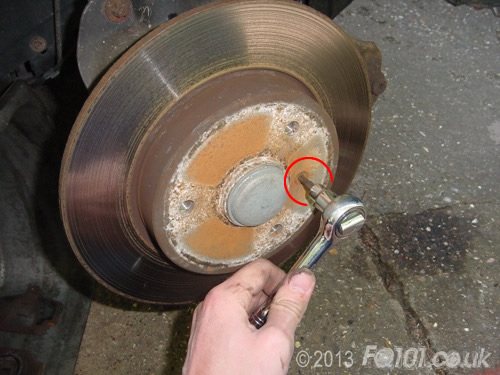
Start with the brake caliper. Use a 17mm spanner to hold the spindle whilst you use a 13mm socket to remove the retaining bolt.
Swing the caliper open and remove the brake pads.
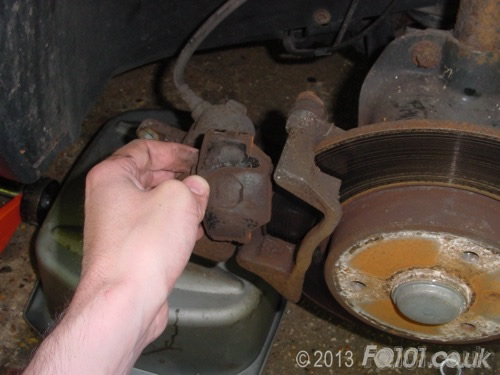
With the pads removed, fit the bolt loosely back into the caliper.
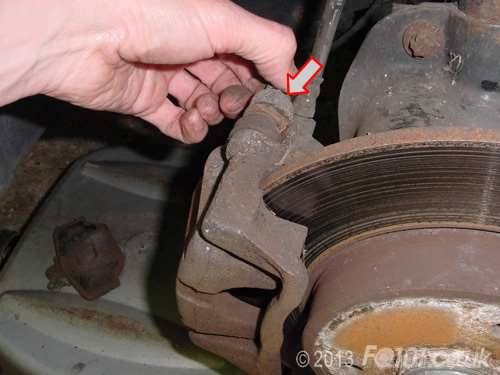
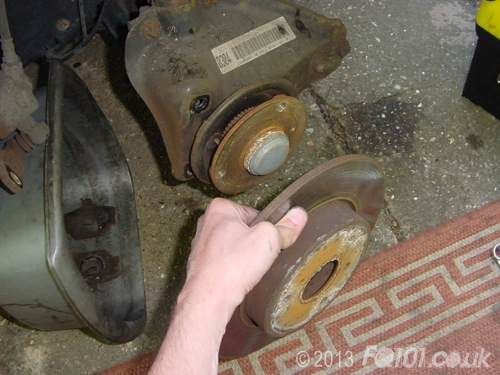
To remove the brake disc, you will need to remove the brake caliper. Remove the two caliper bolts with an E18 socket.
It may help to rotate the steering arm so you can get a bit more leverage.

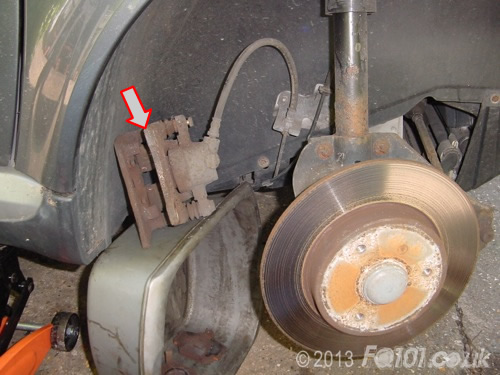
With the caliper free, place is out of the way but keep it supported so no strain is put on the brake hose.
Use a T30 bit to remove the single brake disc retaining bolt.
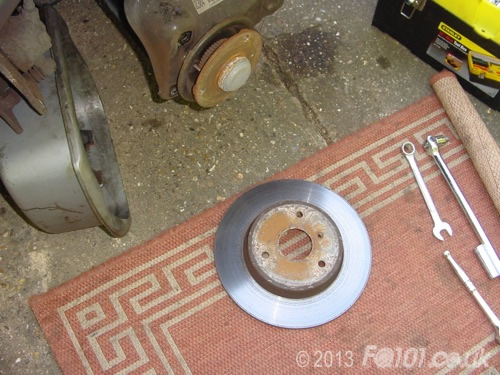
The disc should just lift away from the hub. If it does not, tap the centre with a hammer gently unitil it comes away. We do not recommend using any penetrating oils as you risk contaminating the surface of the brake disc.
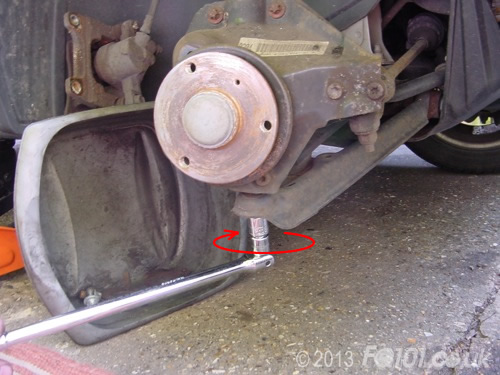
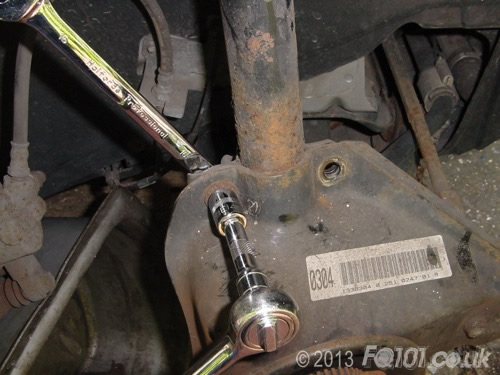
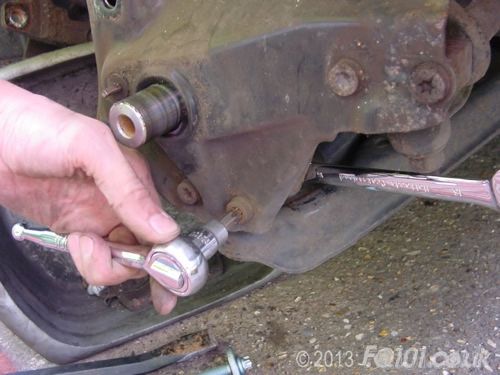
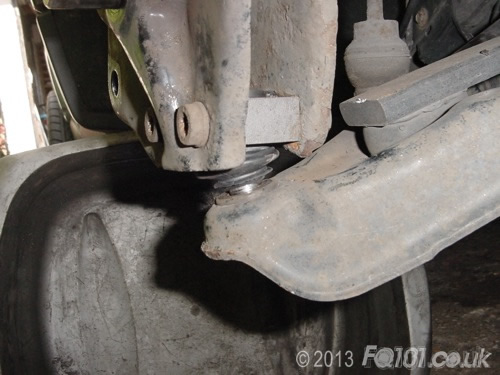
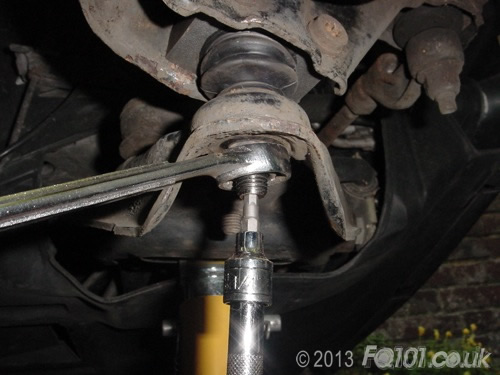
The lower ball joint is held to the wishbone by a single nut. We recommend flooding this nut with a lot of liquid Plusgas before trying to slacken it off. In our case, we were lucky. The nut didn't put up too much of a fight and came off easily.
If you find that both the nut and the stud rotate, use a ring spanner on the nut and you can grip the end of the stud with another spanner (or mole grips).
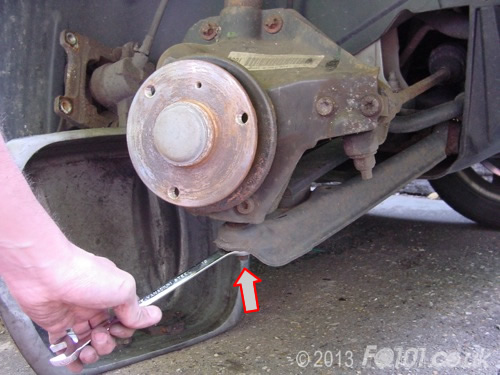
You may need to use a breaker bar to give you better leverage.
With the nut removed from the ball joint, you now need to remove the wheel hub and bearing assembly to get to the ball joint mounting bolts.
Start by removing the hub dust cap. Using an old screwdriver and a hammer, we carefully separated the dust cap from the hub without damaging it.
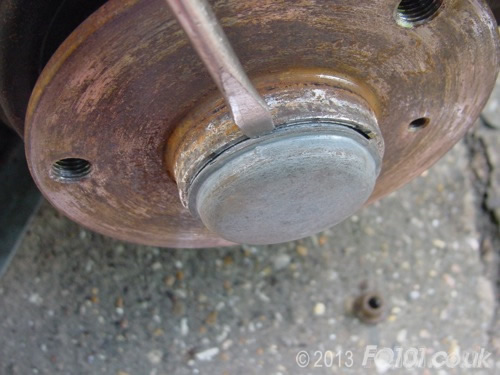
Removing the dust cap reveals the hub retaining bolt which should be replaced when you reassemble.
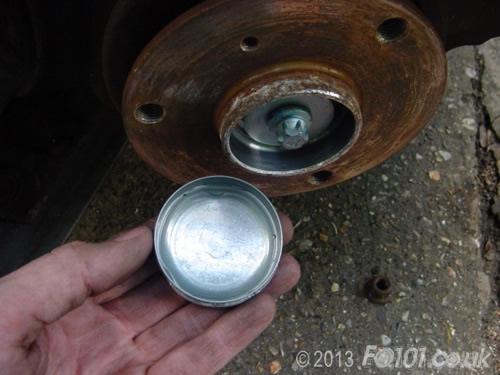
Remove the bolt with an E14 socket (lot of force required!)
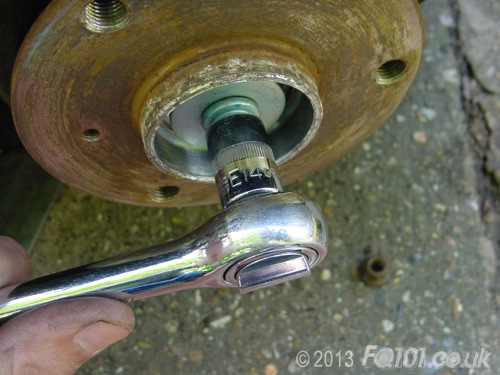
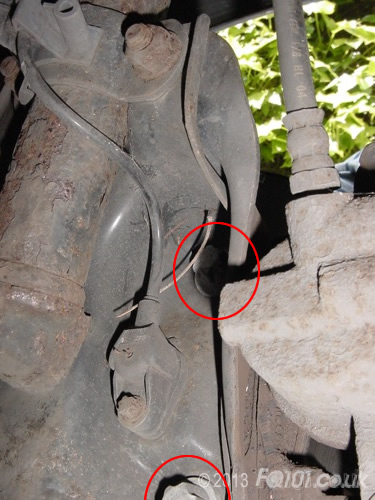
If the bolt doesn't come out, you need to slacken the shock absorber from the back of the hub assembly by releasing its clamp. Use a 16mm spanner and an E14 bit as follows in order to do this:
The hub and wheel bearing should now be free and slide off the hub mounting shaft.
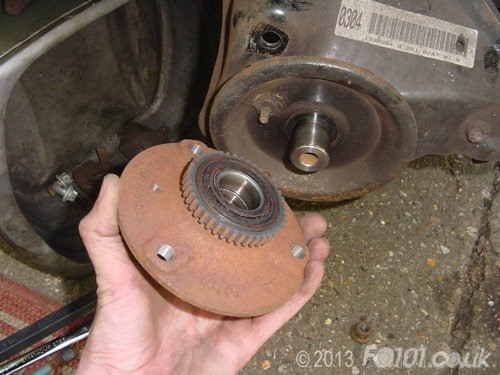
Simply lift off the ABS ring guard.
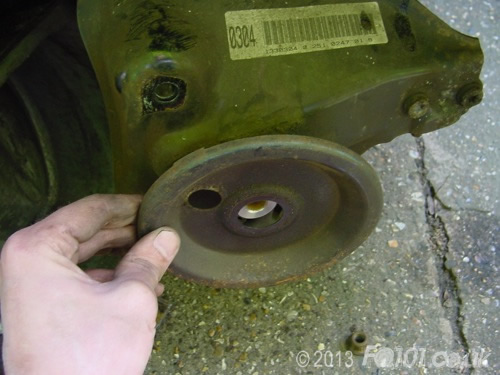
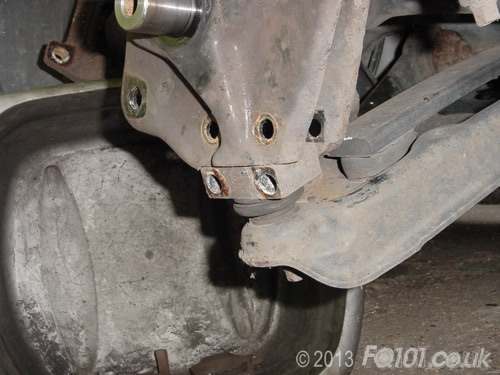
You can now get to the the lower ball joint bolts.
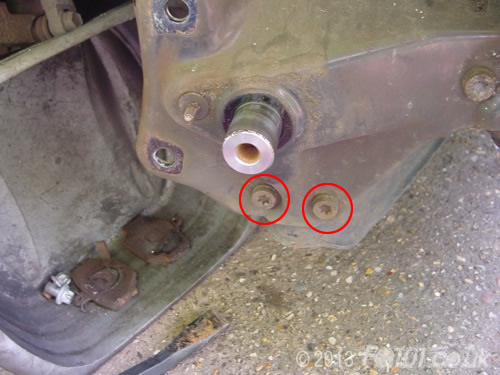
Use a 16mm ring spanner to hold the nuts while you remove the bolt using a T40 bit.
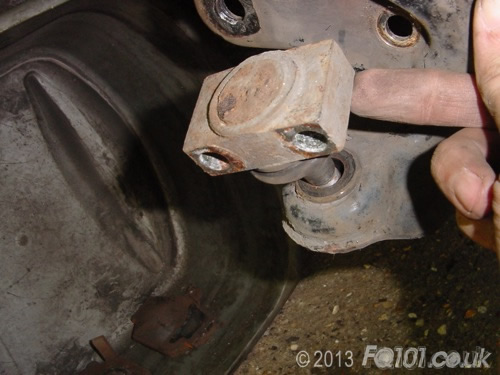
The wishbone will now be free to lower and you can now remove the ball joint.
Lift the old ball joint out of the wishbone.
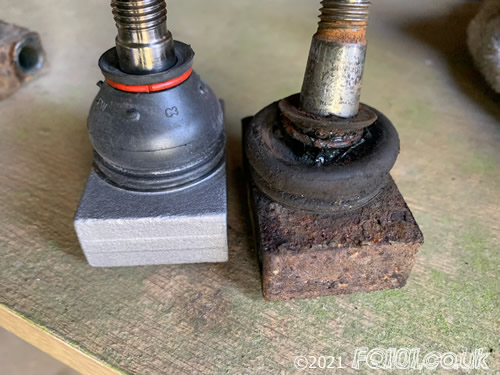
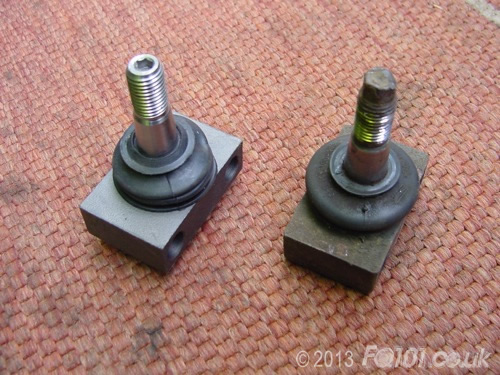
Although the new and old ball joints are from differently manufacturers, it was obvious how warn the old one had become. The shaft had consiberable play and rotated with a grinding sensation. The new one felt completely different.
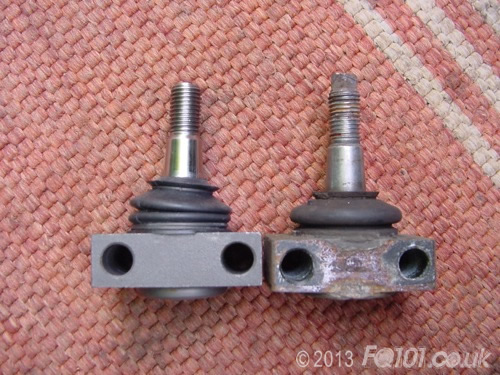
Our new ball join incorporates a hex slot in the end which we can use for reassembly.
Refit the ball joint to the car in the same way you removed the old one. Although not shown in the following picture, a useful tip is to put in the bolts the other wat around. In this way, if you need to get to replace the lower ball joint again the future, you can without having to remove the wheel bearing. Tighten the bolts to 46Nm.
Now tighten up the retaining nut on the underside of the wishbone. To stop the shaft from rotating, we held it in place with a 4mm hex key in the end. Once the nut is tight, you can remove the hex key and correctly tighten the nut to 40Nm. There should be enough grip betwee the ball joint and the wishbone to stop it from rotating as you torque it up.
Continue to replace the wheel hub, brake and wheel to complete the installation. Remember, if you slackened the shock absorber arm clamp, this will need to be tightened.
Although not necessary, we recommend getting your tracking realigned following any works involving the steering system.
The following image is of a recent ball joint change which shows how degraded the joint becomes over time. The rubber wears through allowing debris to enter the joint. Debris will have an abrasive effect, accelarating the wear of the ball-and-socket joint. Left unaddressed, this could result in complete mechanical failure of the joint putting all occupants of the car in extreme danger. Always ensure these joints are in good condition.