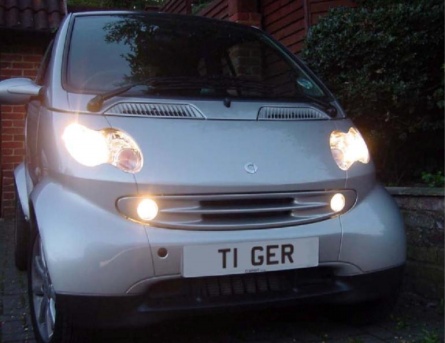
This installation guide was based on a facelift fortwo. If you have an older smart the difference is in the shape of the front grille; everything else should be the same.
Tools required:
- 1x Small Flat Blade Screwdriver
- 1x Philips Screwdriver (No. 2)
- 1x PVC Tape (Not essential)
- 1x Corkscrew (Bear with me – all will be revealed)
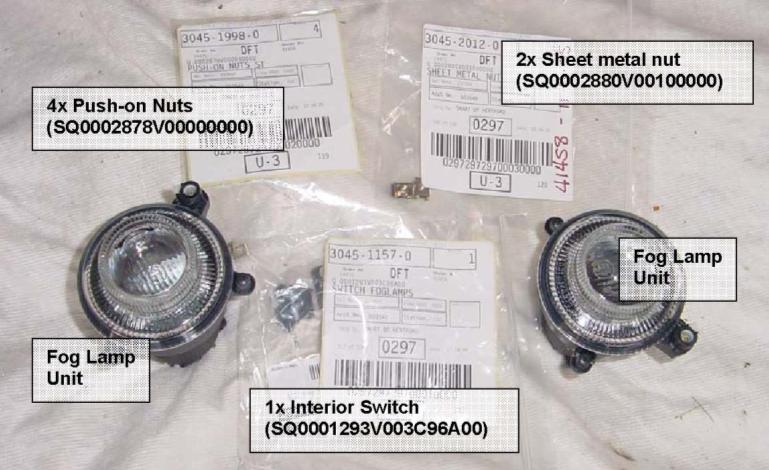
Parts required:
To start, remove the front grille.
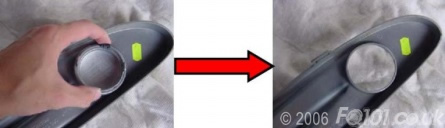
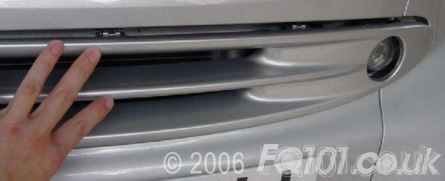
Remove the fog lamp blanking panels from each end of the grille, like this:
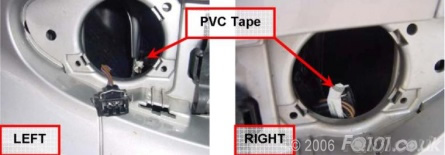
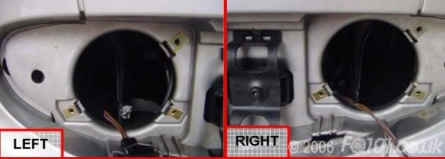
Reach inside the eye sockets of the car and gently feel around for the wiring. Quite often, they are coiled up and taped with white PVC tape, so you may need to have a bit of a rummage. I found the left hand one a little further back than the right. However, they are both accessible.
Offer one of the lamps up to the eye socket. You will notice that the lamps are identical and are not left/right handed. The lamps should be rotated so that the moulded writing on the front of the glass is horizontal. You will notice that the fixing screws and bolts line up with the holes.

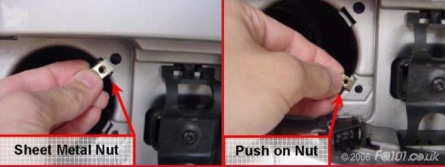
For the bolt, you will need to put the sheet metal nut over this hole (top right on both sides). Use the ordinary push on nut for the other holes.
Push the socket which you unravelled from within the car onto the end of the lamp.
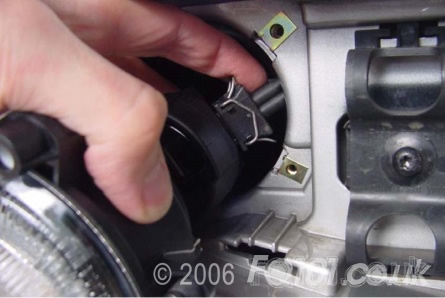
Slide the lamp back into position and begin to fasten the bolt. Before it is fully home, start tightening the two other screws. Do not overtighten these. The grommet should dilate but not to such an extreme that the screw starts to go through it.
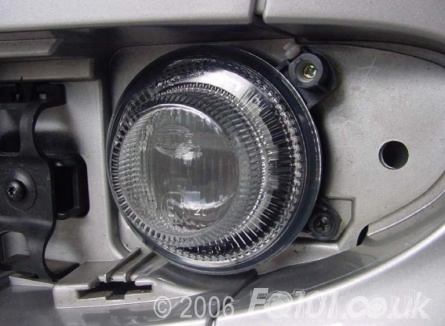
Tighten the bolt so that the lamp is fairly rigid, and check that the lamp is angled slightly below the horizontal. If you find that the lamps are angled too high unwind this bolt a little. This should be your end result:
You may notice that the left light sits more solidly than the right. This is okay; the reason is due to where the bolt is fastened. You will notice on the left side that the bolt fastens next to a solid bit of the structure whereas the right is quite unsupported.

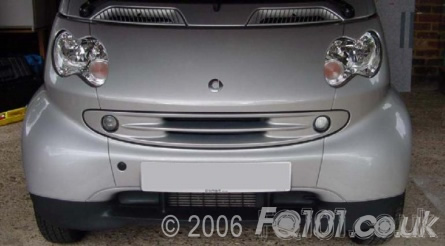
You have now completed the installation of the lamps. Time to fit the grille back into position. It simply pushes back into place. Make sure that all the clips are aligned first.
The fog lamps should peep nicely through the grille.
Now that the exterior work is complete, it is time to fit some more buttons to press in the cockpit. The switch location is to the right of the interior light switch.
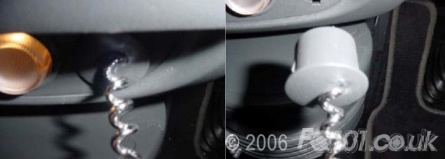
Time to use that corkscrew which you have been wondering about. If you use a screwdriver to try and prise the blanking cover off you risk scratching the rest of the console. You may have noticed that the interior plastic scratches very easily so we want to minimise this. Providing that you don’t want the blanking cover, you can wind a corkscrew into the centre of it and pull. You will not hit anything as you wind, so don’t worry.
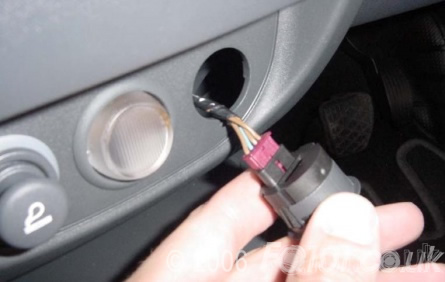
Have a feel around for the connector inside the hole. In my case, I pushed the interior light switch out from the back and found the connector taped to this. Plug the connector into the back of the fog light switch.
Now push the switch back into the hole to finish the installation.
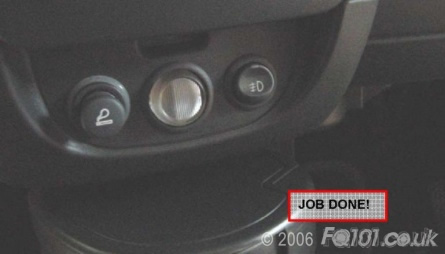
Turn on the ignition. Switch on the headlamps either to side lights, or dipped beam. Now press your new button!
You should see the green LED illuminate on the switch and hear the relay click. Go outside and check to see that both lights are working.
If all is well then see that they turn off okay when pressing the switch. The lights should also turn off when you turn the headlights off. When you do this, you will hear the relay click off, when you turn the headlights on again, the fog lights will not immediately come on. You will need to press the button again to do this.